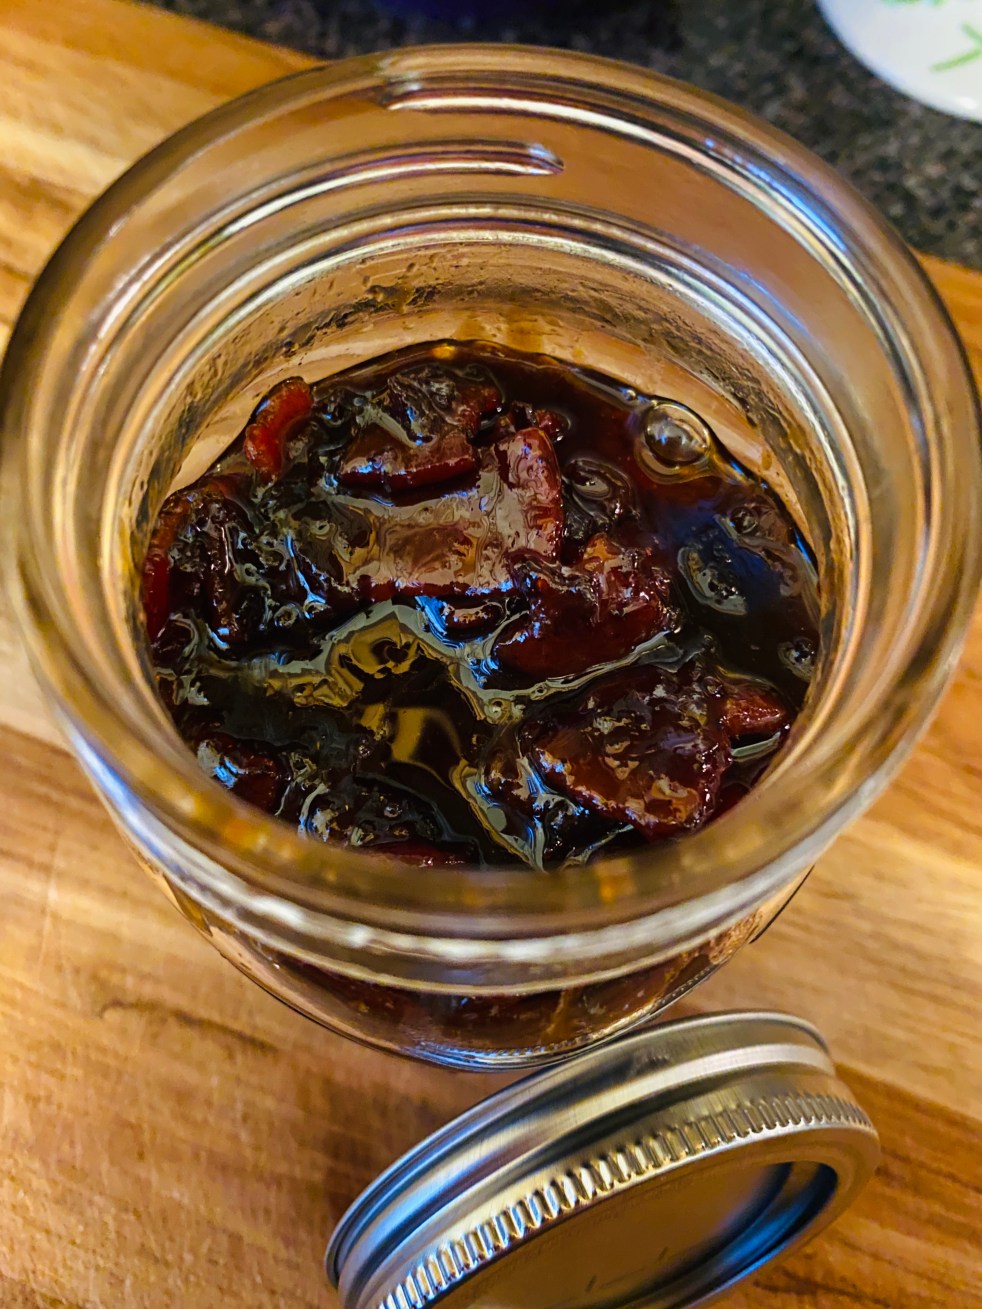
Is there anything better than jam…oh yeah…BACON JAM! This is a super easy and yummy recipe to whip up. I like to use this jam on burgers, BLT’s, toast, a spoon (😉), pizza and it’s even a nice sweet and tangy addition to a charcuterie board. To keep this short and sweet, I hope you enjoy this recipe as much as we do!
Bacon Jam
BACON JAM
Ingredients:
1 pack bacon, chopped into 1/2 inch pieces (I like thick center cut bacon)
1 medium yellow onion, petite chopped
4 cloves garlic, minced
1/3 cup apple cider vinegar (I like Bragg’s with the mother)
1/2 cup dark brown sugar, packed
1/2 cup maple syrup
1 1/2 tsp cayenne (we like ours with a kick…you could add more or less based on your taste preference)
2 tsp salt
2 tsp fresh ground black pepper
Directions:
Add bacon to a cold skillet, cook until just crispy. Use a slotted spoon and transfer to a paper towel lined plate to drain grease. Reserve 1 Tbsp bacon grease and drain rest from pan.
Using 1 Tbsp reserved bacon grease, cook onions and garlic on medium-low heat for 70 minutes or until golden brown.
Add apple cider vinegar and allow to reduce by half.
Add remaining ingredients and bacon to the skillet. Cook until desired jam consistency has been reached.
Allow to cool in a glass bowl or jar and skim any fat that rises to the top.
Store in an airtight jar or container for up to 4 weeks (if it lasts that long) in the refrigerator.
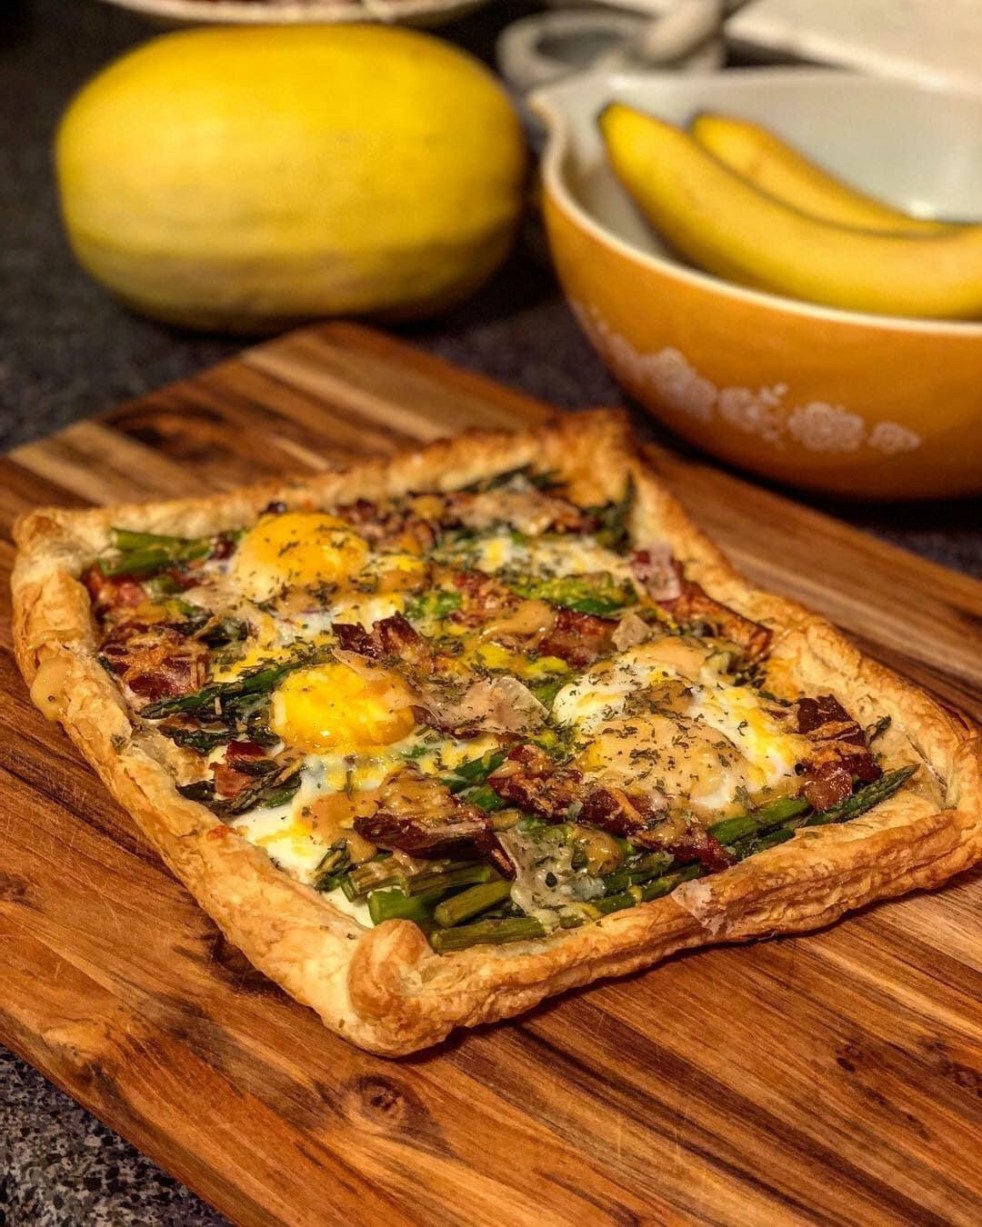
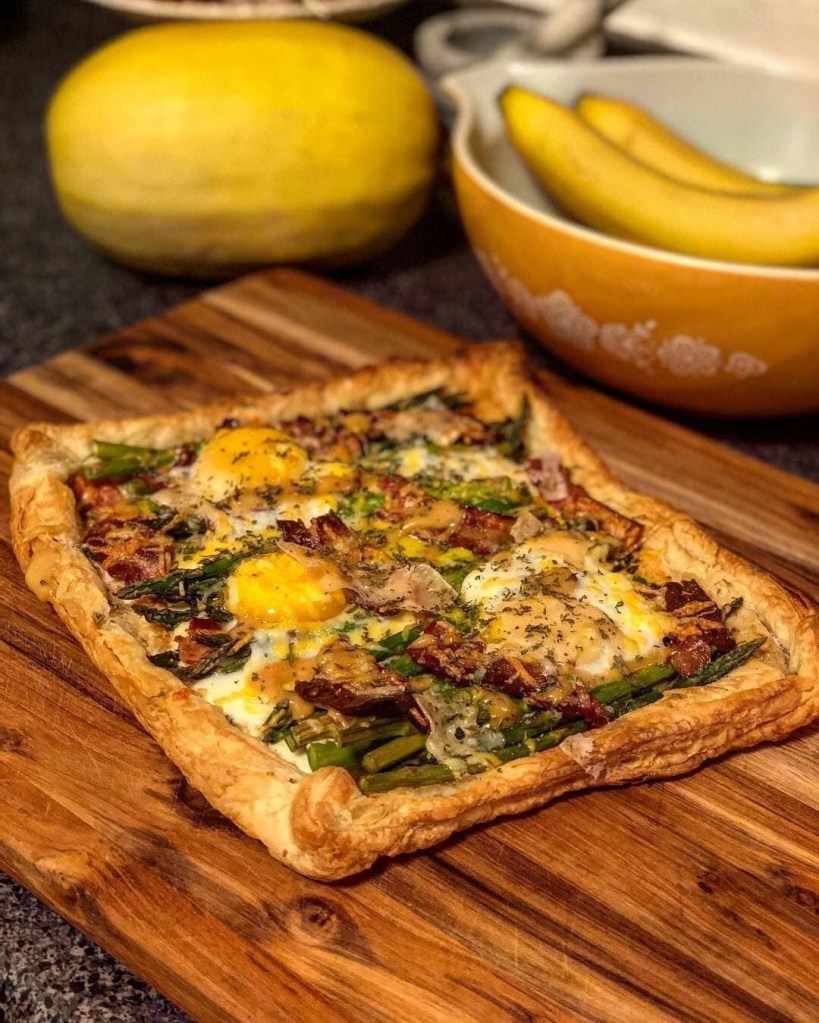
I love nothing more than eating crunchy asparagus, salty bacon, creamy Parmesan cheese, yolky eggs, and crispy puff pastry. the best word to sum up this delicious recipe is simply YUM! If you’re looking for an easy recipe that is super tasty…this one is for you!
I love making this recipe for my family as a fast and easy dinner, but I have also made this as a brunch with a small side salad for my friends. This dish doesn’t just look impressive but tastes impressive as well. I typically cook the bacon first as I like to drain and dab off any grease as not to make the pastry crust soggy. I also coat the asparagus in a touch of olive oil, salt, pepper, garlic, and onion powder to give it a stepped up flavor. Once I’m ready to put it all together I prep the pastry sheet and start building the tart. A fun way to get the kids involved is to let them carefully crack the eggs on the tart just before baking. I even let my daughter help with sprinkling the Parmesan cheese on top. Now, I hope you enjoy this recipe as much as we do!
Asparagus Breakfast Tart
ASPARAGUS BREAKFAST TART
Ingredients:
1 puff pastry sheet, thawed
1 egg, beaten
3 to 4 eggs
1 bundle of asparagus, trimmed
1 Tbsp olive oil
Dash of salt, pepper, garlic powder, and onion powder
6 slices bacon, cooked
1/4 cup Parmesan cheese, shredded
1 Tbsp parsley, chopped
Directions:
Preheat oven to 400 degrees F.
Toss asparagus in olive oil, salt, pepper, garlic and onion powder. Set aside.
Roll out puff pastry to desired size on a lightly floured surface. Food up each side and tuck corners to make a border. Using a fork, polk holes throughout the center of the pastry. Move to parchment paper lined baking tray and refrigerate for about 10 minutes.
Arrange asparagus on tart within the borders of the tart, add bacon being sure to leave room for eggs. Add half the cheese, then carefully crack eggs onto tart being careful to not break the yolks. Top with remaining cheese.
Generously brush border with beaten egg for a golden crust.
Bake for 8 to 10 minutes or until the egg whites are set; egg yolks should still be wiggly.
Ever just crave a good soup no matter the time of year? Well, this soup is my all-time favorite “any time of year” soup! The secret is it’s mostly cauliflower which helps with calorie cutting. I really enjoy the recipes that Skinnytaste puts out as most of the recipes are for reduced-calorie meals that allow you to enjoy classics, but at a healthier option. This rich and flavorful soup recipe can be found here https://www.skinnytaste.com/baked-potato-soup/
I recommend giving it a try as even my toddler thinks it’s amazing! It takes roughly 20 minutes from prep to table, so it definitely qualifies for a fast and delicious weeknight meal. When I’ve been in a pinch and didn’t have any fresh cauliflower on hand, I used frozen cauliflower and it works just fine. The key is using your immersion blender to really get off the cauliflower and potato blended into a creamy, smooth, and silky soup. Now, I hope you enjoy this recipe as much as we do and as an added treat….here is our daughter enjoying Skinnytaste’s Loaded Baked Potato Soup!
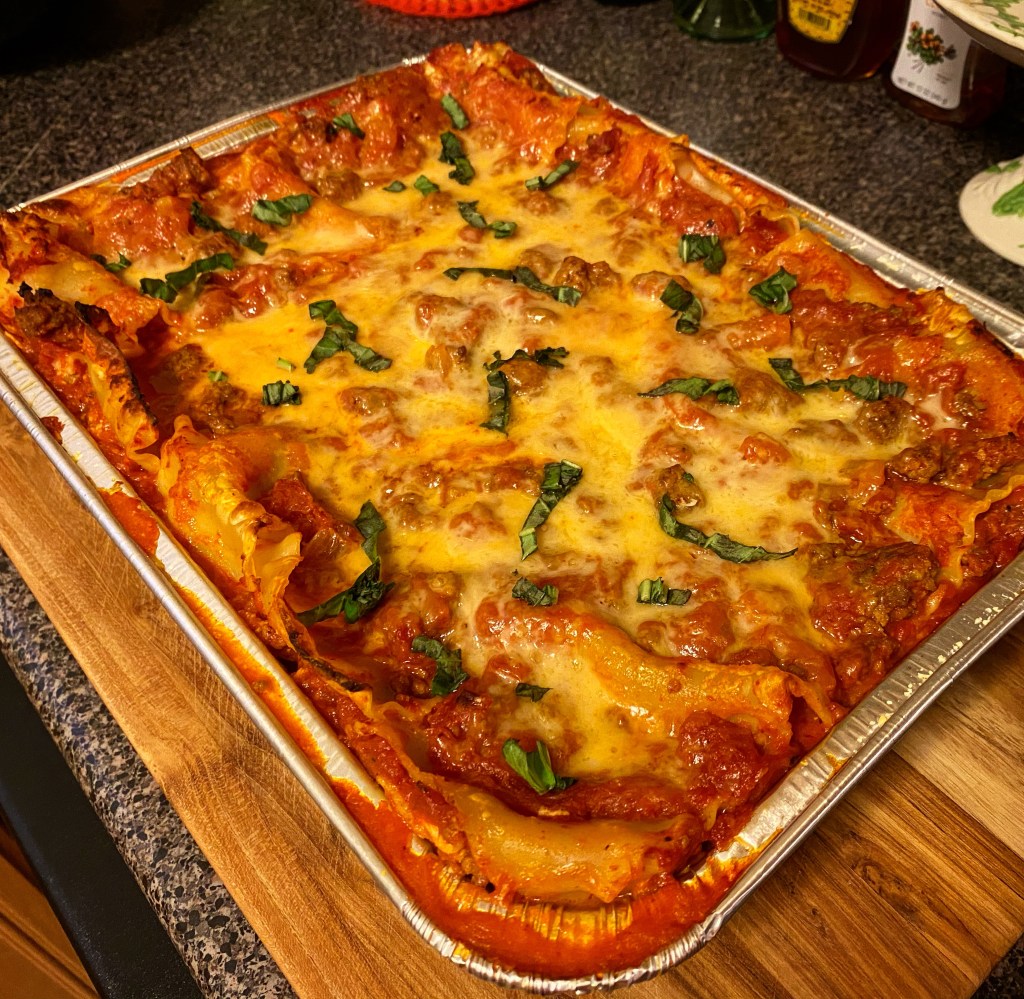
Ok, so we’ve been binge watching Friends since we just completed The Office in record time…no thanks to the quarantine! While watching those early episodes we came across one of my favorites which is The One With The Dozen Lasagnas….this episode inspired me to finally try Binging with Babish’s Lasagna! You can find the recipe here https://www.bingingwithbabish.com/recipes/ziti-lasagna
This was an easy labor of love and perhaps the first homemade lasagna that I’ve ever made that actually sliced up like a lasagna should and not turn into a blob of ingredients on my plate. It is a very time consuming dish, but most of the time delicious meals take a while anyway due to a lot of prep and bake. One thing I loved about this recipe was how much I learned! I love watching his technique and trial and error processes. It makes me feel like I’m becoming a better home cook and there is always something to take away and grow from.
This dish has it all! It’s hearty, it’s filling, it’s gooey and it is DELICIOUS! So, if you haven’t already, I suggest you click on this link https://www.bingingwithbabish.com/recipes/ziti-lasagna and take a weekend to make this delicious lasagna!
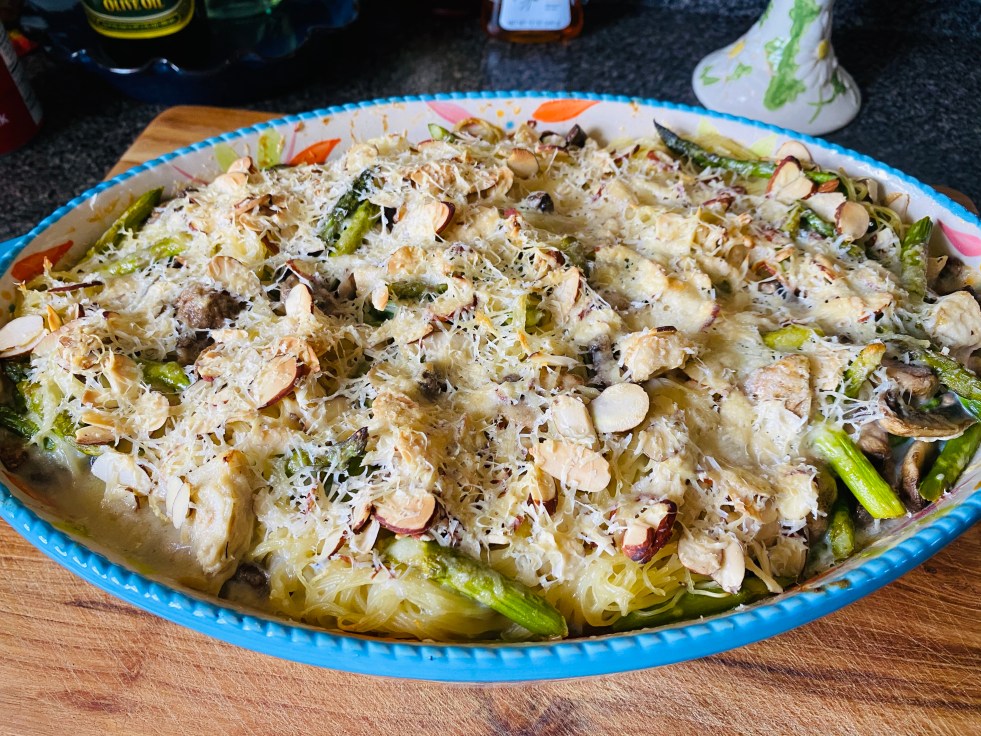
This is a yummy was to bake up a fast weeknight meal that is packed full of something everyone loves! I like to make this Chicken and Veggie Pasta Bake on the regular and I really enjoy how versatile this dish is. You can choose all sorts of veggie combinations with this recipe. It should be fun to try new combos. Keep in mind the season as you could always utilize fresh from the garden veggies like squash and zucchini or even a variety of peppers. In the winter months, I like to use mushrooms and peas because frozen peas work great in a dish like this. There are a couple of staples that are must for a deep and rich flavor. Those staples include Parmesan cheese and sliced almonds. Without these key ingredients your dish would be missing that crunchy topping that completes the whole dish. Now, I hope you enjoy this recipe as much as we do!
Chicken And Veggie Pasta Bake
CHICKEN AND VEGGIE PASTA BAKE
Ingredients:
1 1/2 lb boneless, skinless chicken breast, cooked and sliced (cook it how you like it…grilled is our favorite!)
3 Tbsp olive oil
1/2 (16 oz) pkg angel hair pasta, cooked and cooled
1 (8 oz) pkg mushrooms, sliced
1 bundle asparagus, cut into 1 1/2 inch pieces
1/4 cup butter
3 Tbsp white wine
3 Tbsp flour
3 cups milk (room temp)
1 cup Parmesan cheese, shredded
1/2 cup sliced almonds
Salt and pepper to taste
Directions:
Cook chicken according to your preference. We prefer to grill the chicken, rest it and then slice it. You could even bake or roast the chicken and then shred it.
Preheat the oven to 350 degrees F and butter a casserole dish.
Cook pasta to just under; should only boil for 1 minute.
Sauté mushrooms in a hot pan until juices start to run out and they become brown, add white wine and asparagus; cook for 3 additional minutes. Remove veggies and leave liquid in the hot pan.
Add butter to liquid and allow to melt and bubble. Add flour and cook for 2 minutes or until the flour smell has dissipated; add milk and cook for 5 minutes stirring constantly. Once gravy is thick remove from heat.
Stir in 1/2 cup of cheese and add pasta, veggies and chicken; combine well.
Add pasta mixture to baking dish. Top with almonds and the rest of the cheese.
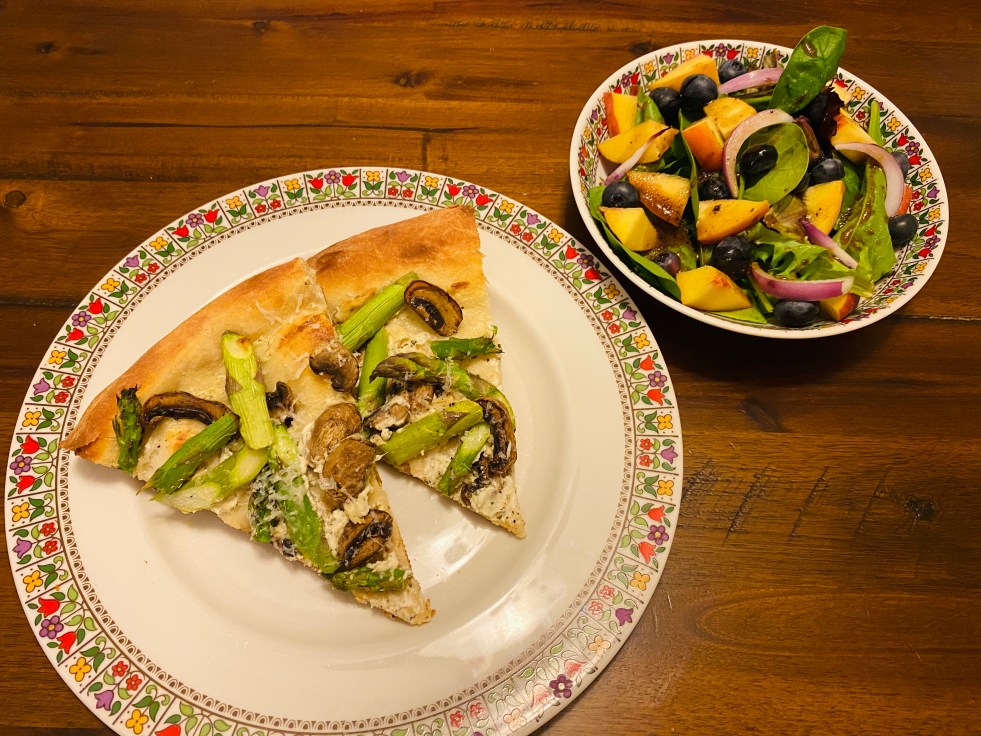
This meal was a fabulous end to a fun filled Sunday! We took it upon ourselves to get out of the house and go for a drive on the Blue Ridge Parkway. It was so a cool 64 degree ride with the wind blowing through our hair. It’s days like this that make me crave summer on a plate!
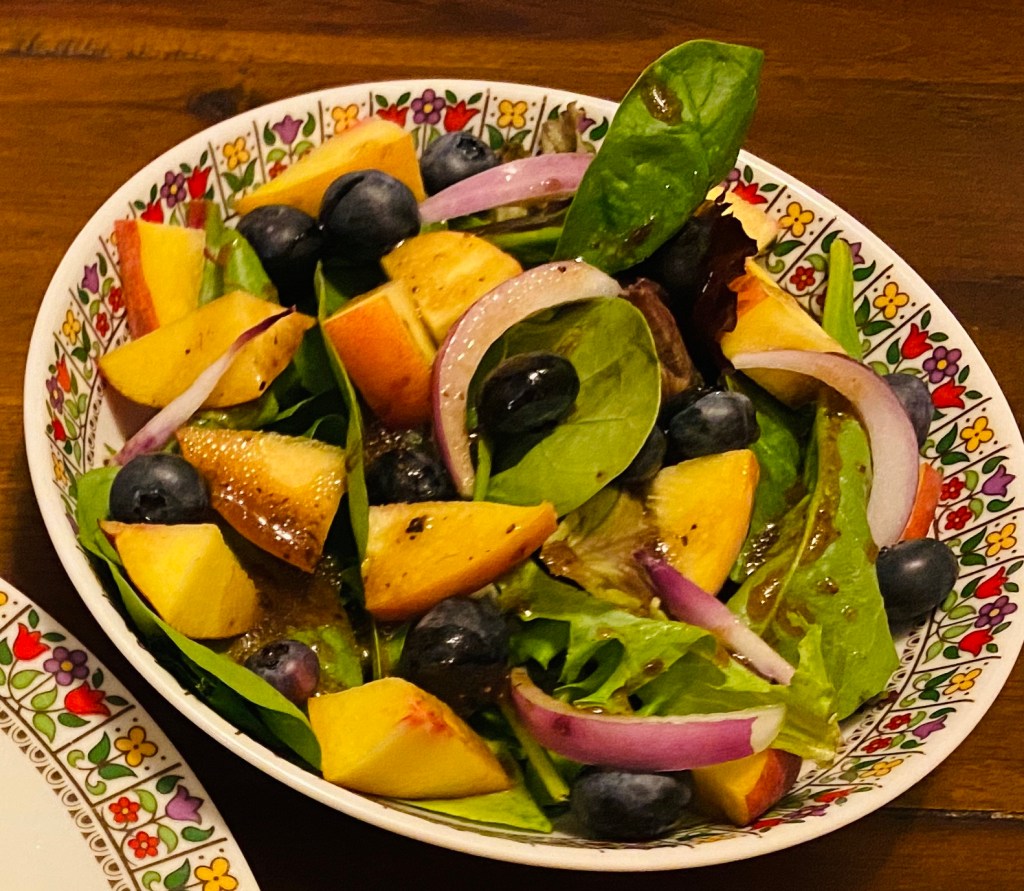
Asparagus and Mushroom Pizza with a Peach Berry Salad.
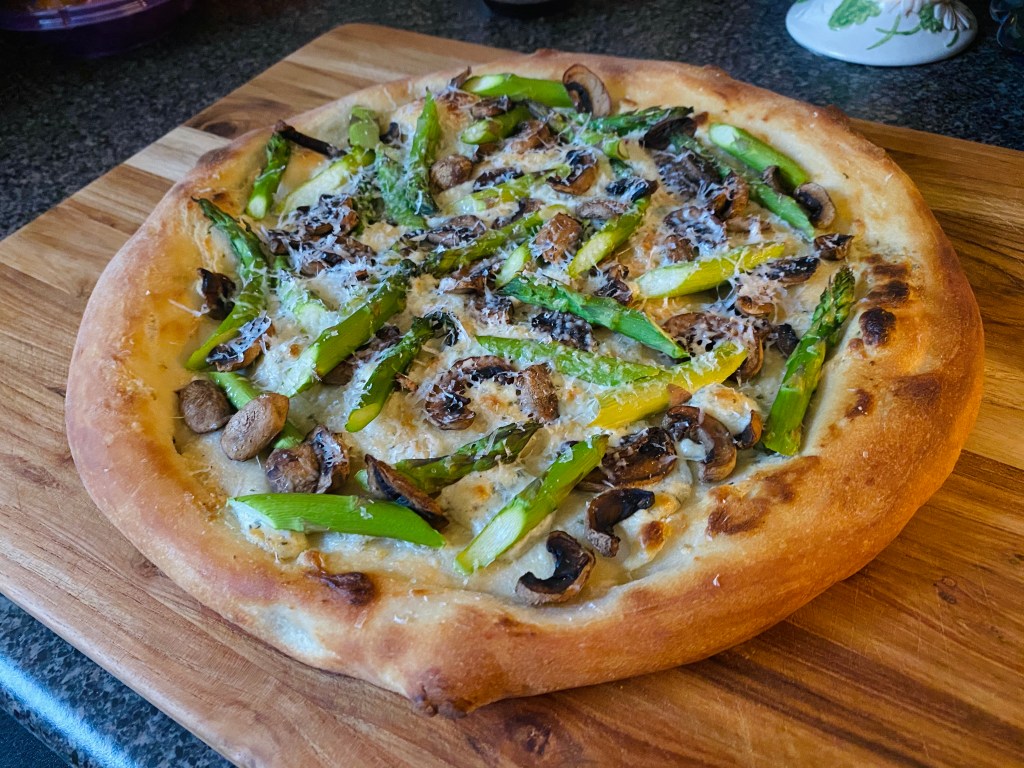
This meal is so refreshing as it incorporates many summer flavors. The mushrooms are cooked prior to adding them to the pizza by simply browning for a couple of minutes and lastly adding a splash of white wine. This helps bring out the deep and meaty flavors of the mushrooms. I slice the asparagus at an angle after finding the area in the stock to snap them. By trimming them down it allows for a easier cook on the asparagus. The salad helps complete the meal with a delicious mix of blueberries and peaches. I like to add a hint of red onion in the salad as well for a bit of a bite to the salad. Sometimes red onion can be more powerful than what you would like, so I like to soak the red onion slices that I use on my salads. By soaking the red onion it takes the punch down a bit. Now, for the recipes!
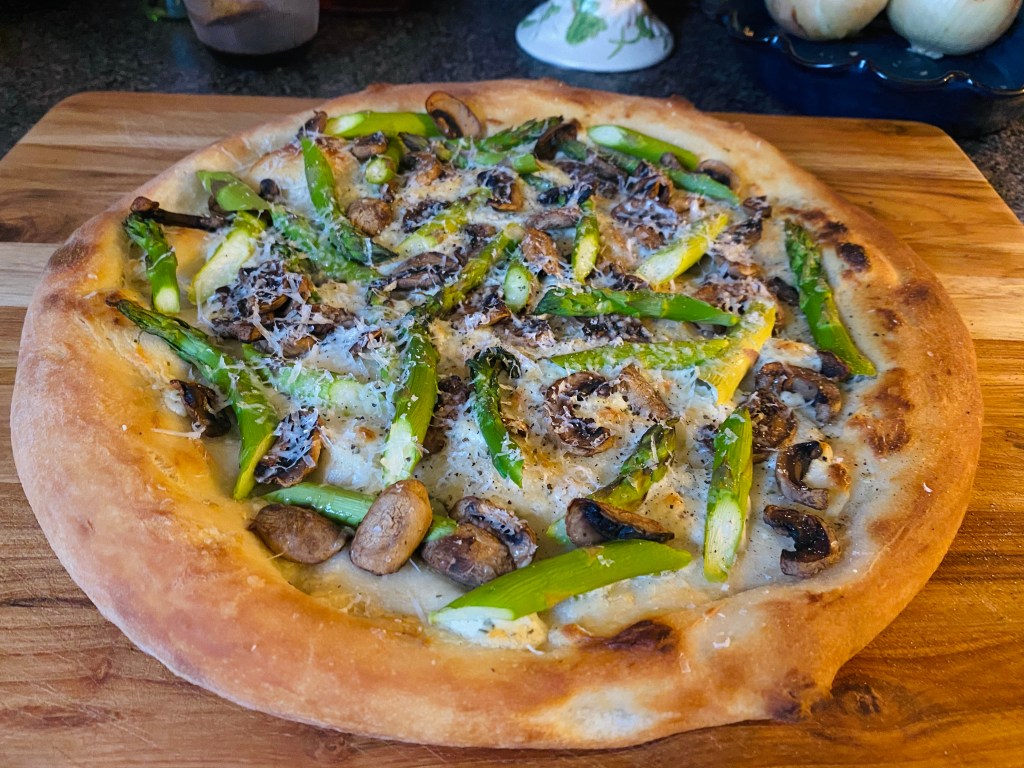
Asparagus and Mushroom Pizza
ASPARAGUS AND MUSHROOM PIZZA
Ingredients:
1 pizza dough
1 cluster of asparagus, trimmed and sliced
1 (8 oz) container of mushrooms, sliced
1/2 container of Garlic & Herbs cheese spread (I used Alouette Cheese)
Parmesan cheese
1 Tbsp white wine
Olive oil
Directions:
Pre heat oven to 450 degrees F and prep pizza dough.
In a medium pan cook mushrooms on med-high heat until they start to brown; add white wine and reduce for 3 minutes. Remove from heat and set aside.
Once pizza dough is stretched into a circle, pre-bake crust for a couple of minutes or until the crust just starts to brown; remove from oven.
Top pizza with cheese spread and be sure to spread out evenly.
Top with half of the mushrooms, then add asparagus and finally the rest of the mushrooms.
Rub olive oil on crust.
Bake for 10 minutes or until crust becomes golden brown; remove from oven and immediately top with Parmesan cheese.
Make salad while pizza cools.
Peach Berry Salad
PEACH BERRY SALAD
Ingredients:
2 peaches, cut into slices, then in half
1/4 cup of blueberries
A couple of slices of red onion
A couple of handfuls of mixed greens
Balsamic vinaigrette
Directions:
Mix all ingredients together, except the balsamic vinaigrette.
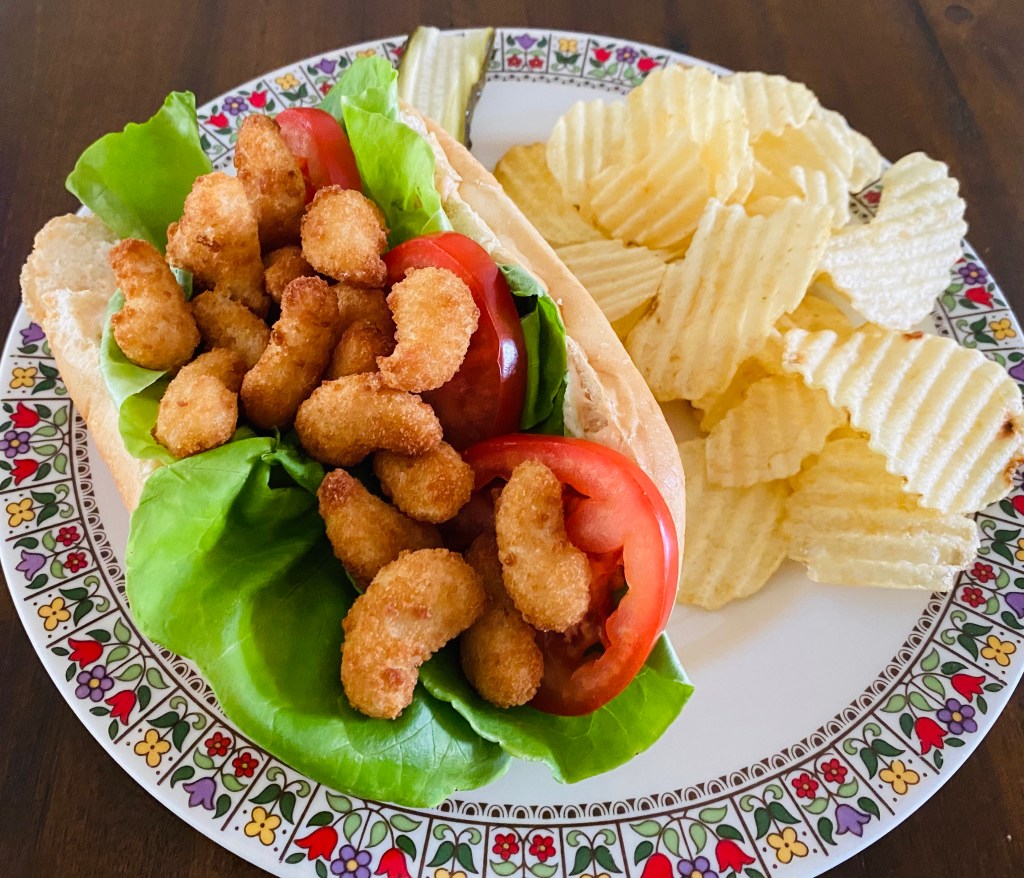
Looking for a fast and tasty lunch or dinner? A shrimp Po’Boy is one of my favorite sandwiches to whip up. It’s super easy, fast and delicious! All you need is a sub roll, frozen popcorn shrimp, roma tomatoes, butter lettuce, remoulade sauce and a couple of small sides like potato chips and pickles. The secret to a great Po’Boy is getting the shrimp crispy and having a kickin’ remoulade sauce.
I made my own remoulade with mayo, dill and touch of spicy cocktail sauce. We like a little kick with our Shrimp Po’Boy and this definitely kicked it up a notch. For my remoulade sauce I took 1/4 cup mayo, a pinch of dill and 2 tsps spicy cocktail sauce and mixed it all together for a delicious remoulade. For the sides it really just depends on what we have on hand. Sometimes I make French Fries in the air fryer to go along with this meal, but today I opted for potato chips and a pickle. Now, I hope you enjoy this recipe as much as we do!
Shrimp Po’Boy
SHRIMP PO’BOY
Ingredients:
Sub roll, sliced almost in half lengthwise
3 slices of a Roma tomato
A couple of leaves of butter or living lettuce
2 Tbsps remoulade (my recipe is in the above paragraph)
18 to 20 popcorn shrimp, cooked in air fryer
Chips or French fries
Pickle
Directions:
With a sharp knife slice sub roll almost in half lengthwise; set aside.
Set air fryer to 8 minutes at 380 degrees F; add shrimp and shake basket at half way mark. Remove from basket once shrimp is done.
Add remoulade to top and bottom of sub roll, add lettuce, tomatoes and top with shrimp.
Add chips or fries and a pickle to your plate and enjoy!
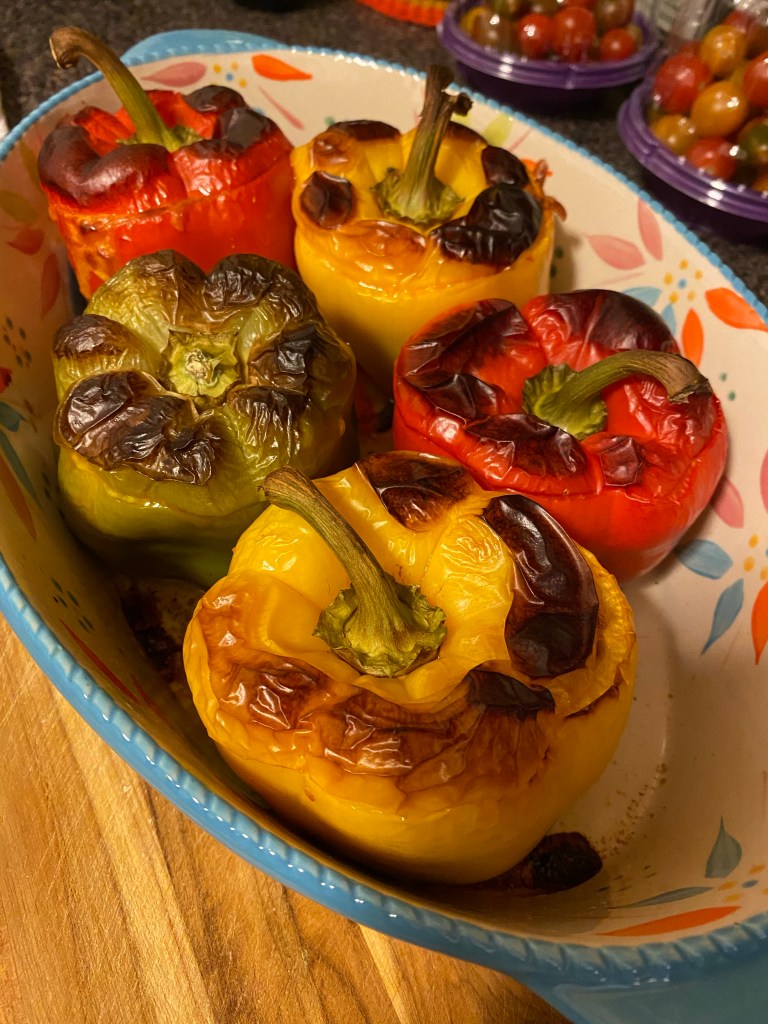
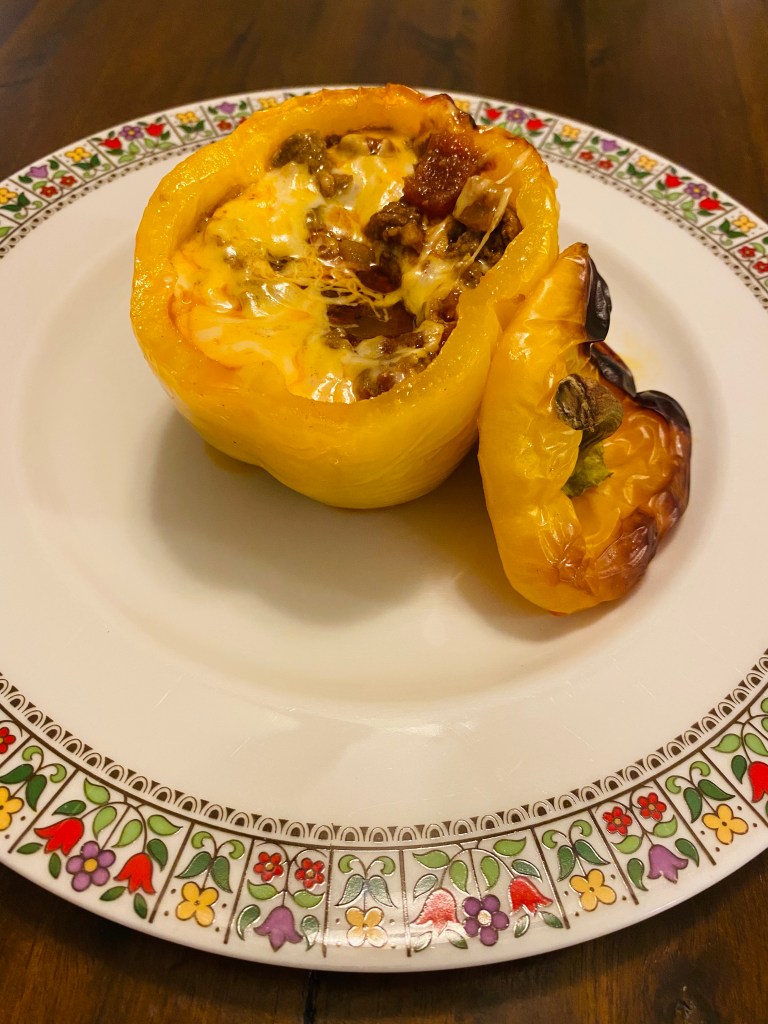
This recipe is tasty, easy and packed with incredible flavor! It just takes a little prep with few ingredients to make this colorful and delicious dish. I really enjoy making this recipe because it’s so easy, in fact, I mostly make this dish through the week…you can also prep ahead of time to!
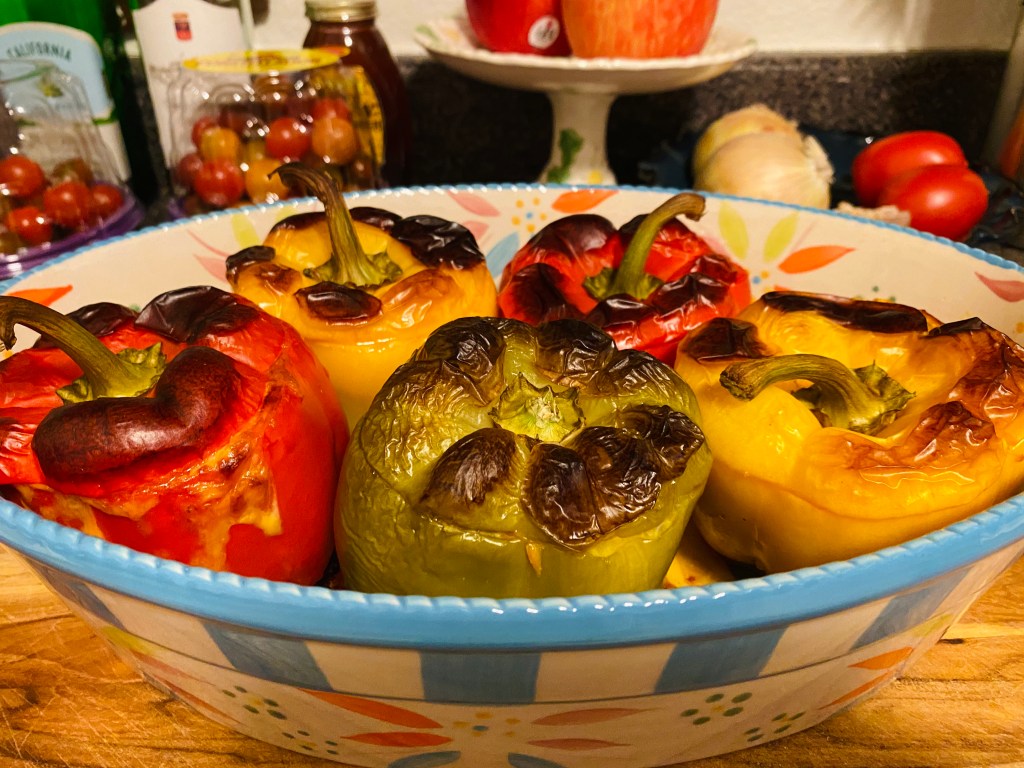
I have used all green peppers in the past, but I think this dish is stunning with red, yellow, green and even orange peppers. The different colored peppers not only add a beautiful presentation, but you can get so many different flavor profiles from the variety bell peppers. These peppers are the vessel for an amazing filling of meat, sauce and gooey cheese….how could that be bad?!
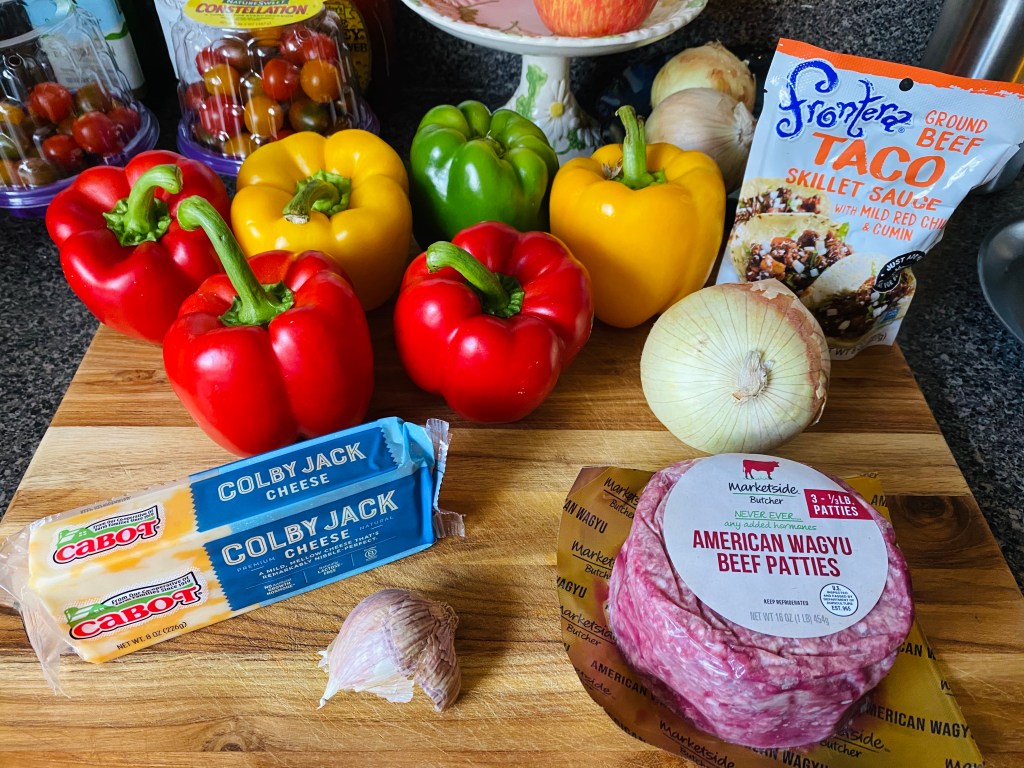
Ingredients for Taco Stuffed Peppers.
I know I always say that the key to any good recipe becoming a great one is about the quality of your ingredients. I recently discovered the Marketside American Wagyu Beef Patties from Walmart. These beef patties are great and seem to sell out at our local Walmart as fast as they can stock them. They come in 3 1/3 lb packages and that just happens to be the perfect size for this recipe. My family LOVES Cabot Cheese and when I’m cooking any recipe that requires cheese, I always buy a block to shred myself. Most pre-shredded cheeses come with a coating of potato starch. The potato starch is gritty and leaves an oily texture to the pre-shredded cheese which I don’t want in my meal. The Frontera taco sauce adds such a powerful and robust flavor that ties the dish together beautifully.
Taco Stuffed Peppers
This dish is a great make ahead especially if you are making it over the weekend. I typically cook the meat and get the peppers filled then place them in the baking dish. I then Put them in the fridge until I’m ready to bake them. Most of the time I just whip this recipe up and bake them immediately, but you could prep them all the way through prior to baking to save some time. Now, I hope you enjoy this recipe as much as we do!
Taco Stuffed Peppers
TACO STUFFED PEPPERS
Ingredients:
5 to 6 large bell peppers of any color
3 1/3 to 1 lb ground beef
1 Tbsp olive oil
1 large sweet onion, chopped
2 cloves garlic, diced
1 package Frontera Taco Skillet Sauce
1 (8 oz) block of Colby cheese, shredded
Directions:
Preheat oven to 350 degrees F.
Carefully cut the tops off each pepper; remove seeds from pepper and tops. Reserve the tops of each pepper for topping later.
Add olive oil to a sauté pan and turn pan to medium-high heat. Add onions and sauté until they start to turn translucent. Add ground beef; cook until browned. Add garlic and cook an additional 2 minutes.
Add sauce to beef mixture and allow to cook for 3 minutes; remove from heat.
Add cheese to each pepper bottom, add meat filling to about half way, add more cheese, top with meat and finally top with a little more cheese. do this with each pepper.
Top each pepper with its matching top.
Add peppers to a baking dish. (If you are prepping this meal to bake later; cover with plastic cling wrap and place in fridge until ready to bake.)
Bake peppers for 55 minutes to 1 hour.
Remove from oven and allow to cool for 10 minutes.
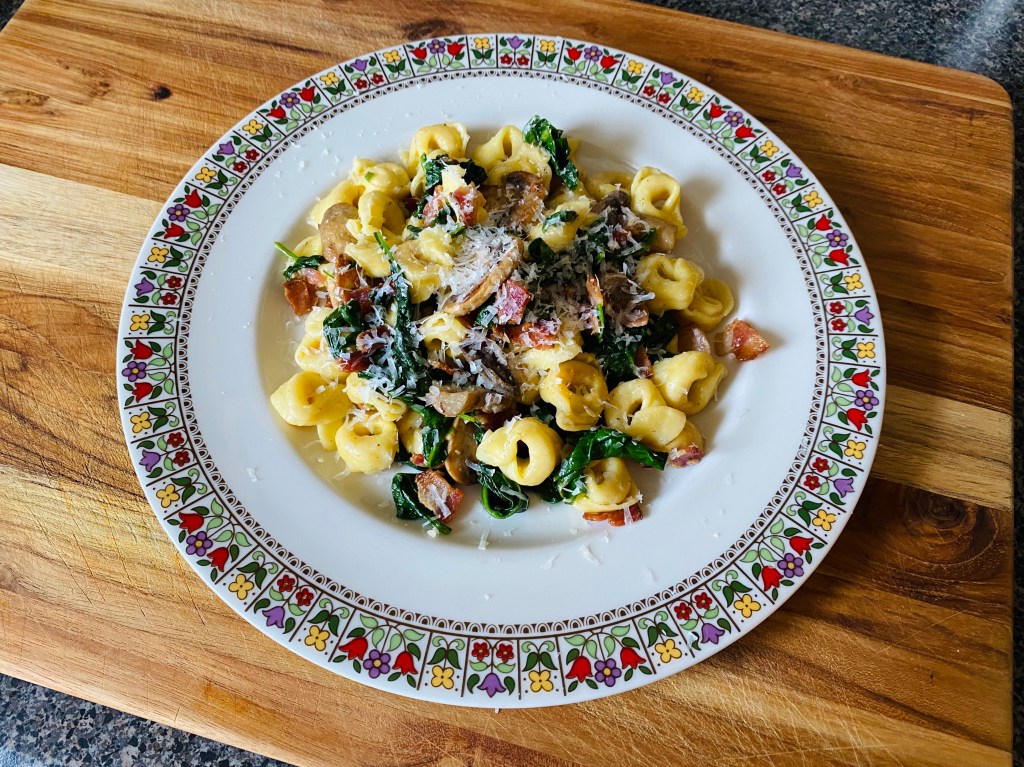
Cheesy Tortellini with Bacon, Spinach and Mushrooms in a Brown Butter Sauce.
This dish is absolutely delicious…not to mention cheap, easy and stress free for a fast weeknight meal that is sure to be a family pleaser! It’s cheesy, rich, buttery and full of fabulous flavor. This is one of those meals that I would make for a dinner party not only because of how delicious it is, but how simple it is to make. This pasta dish is definitely in the 30 minute meal rotation which is perfect for a fast weeknight meal as well.
All you need to make this meal is a Dutch oven (I use my Lodge Cast Iron Dutch Oven) and a medium size pot to boil the pasta and a sauce pot to make that tasty brown butter sauce. That deep flavor sauce is super easy to make and whips up in about 10 minutes. The brown butter sauce is what pulls the dish together and you will know that your sauce is done when you start to smell a nutty smell from the butter. It’s this flavor that ties everything together for a rich finish. Now, I hope you and your family enjoy this meal as much we do!
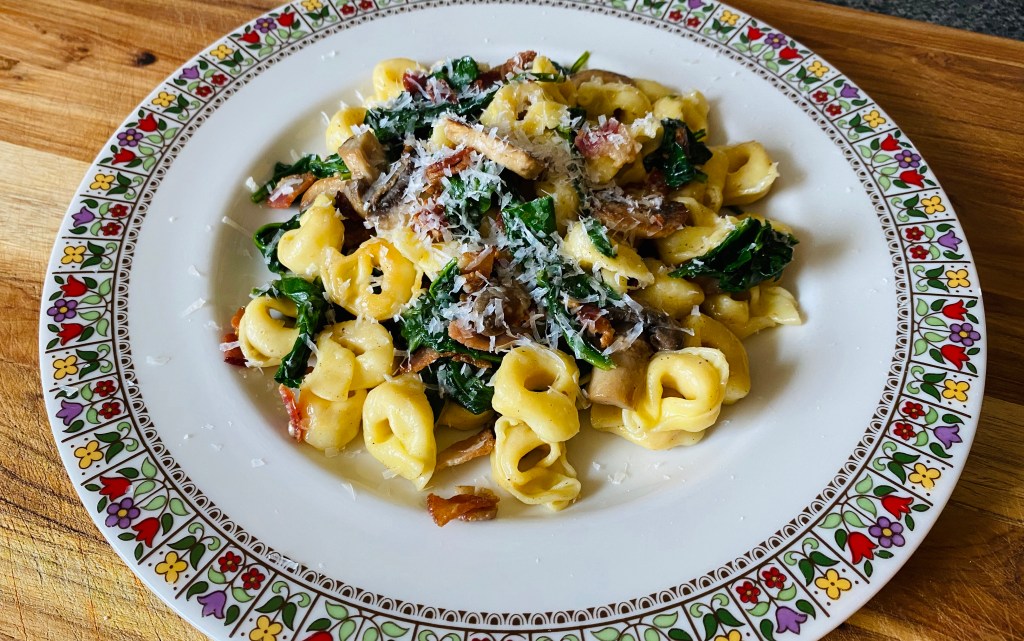
Cheesy Tortellini with Bacon, Spinach and Mushrooms in a Brown Butter Sauce.
CHEESY TORTELLINI WITH BACON, SPINACH AND MUSHROOMS IN A BROWN BUTTER SAUCE
Ingredients:
1 package cheese tortellini
6 strips of thick cut bacon, diced
1 (5oz) package spinach
1 package mushrooms, sliced
1 garlic clove, minced
1/4 cup white wine
1/2 cup unsalted butter
Dash of white pepper
Parmesan cheese, grated (for garnish)
Directions:
In a Dutch Oven brown off diced bacon; remove bacon to a paper towel lined plate and reserve 1 Tbsp of bacon fat.
Cook mushrooms in bacon fat for about 3 minutes on medium heat; add wine and reduce for 3 minutes.
Boil water for pasta; cook according to package and drain.
Strain mushrooms and reserve the wine in a small sauce pan. Add mushroom back to Dutch Oven and cook for 3 more minutes; add spinach and let spinach wilt; add bacon and take off heat.
In the small sauce pan add garlic and butter; let simmer for 10 minutes. When you smell a nutty smell and the color is brown the sauce is done.
Add pasta to veggie mix; top with brown butter sauce. Gently mix with tongs and serve with freshly grated Parmesan.
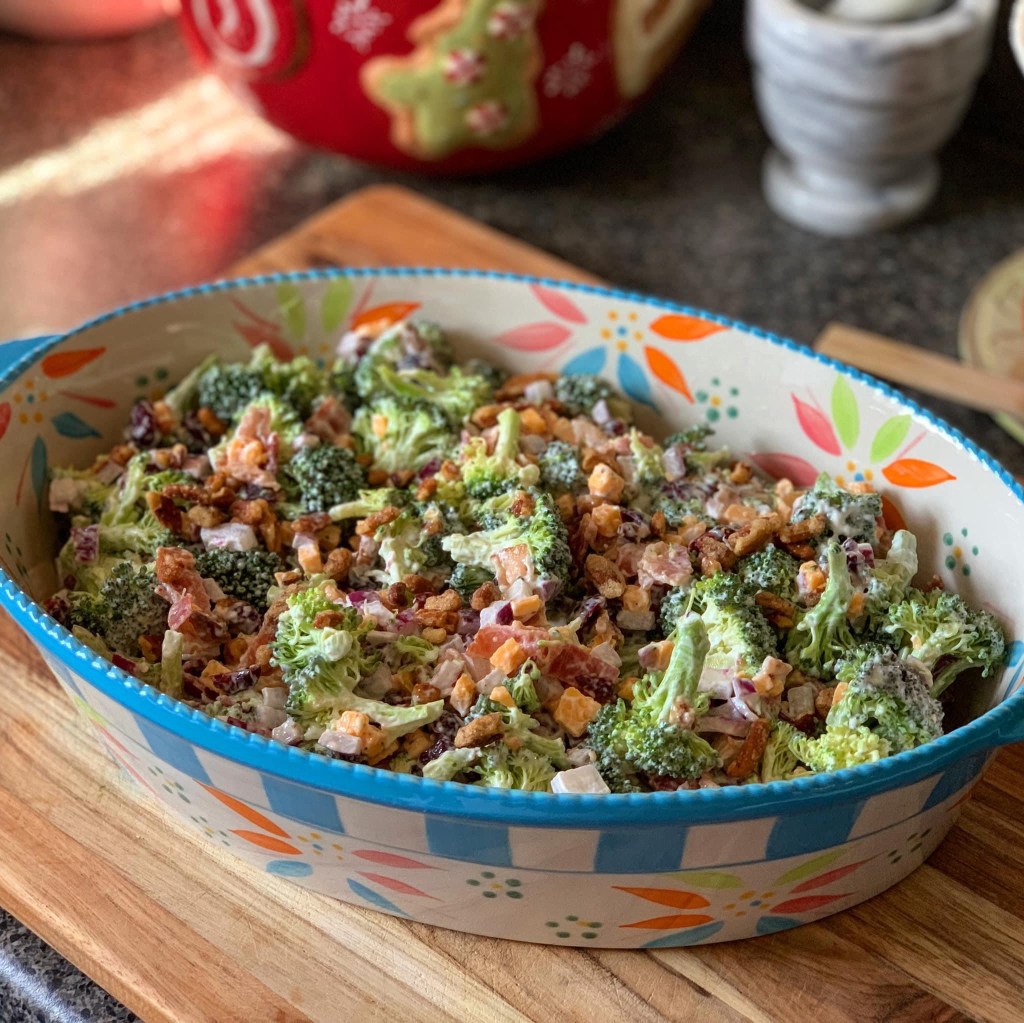
Anytime my family gets together for a huge dinner it’s always requested that I bring my Yummy Broccoli Salad. Usually there are plenty of starchy sides to choose from, so I think to bring this dish to add something a little on the healthier side. Broccoli is a family favorite and when you add cheese and bacon it really adds the extra YUM to this veggie dish. It’s also a colorful dish that really draws you over to it. My toddler says it’s really yummy, so here is another toddler tested and approved dish.
This is the type of dish that is great on the day you make it, but if you let it set in the fridge overnight; it will be DELICIOUS the following day. By letting it set overnight it allows those ingredients to really get to know each other. That’s probably the most important tip I have for this recipe…let the salad soak up all the goodness of the dressing in order to get the most flavor. It’s such a refreshing dish that goes perfectly with any big family meal or a light picnic brunch…which makes it very versatile!
This dish is all things…crunchy, salty, sweet and cheesy. It is super simple to make and looks great when presenting. Now, I hope you enjoy this dish as much as my family and I do!
Yummy Broccoli Salad
YUMMY BROCCOLI SALAD
Ingredients:
6 slices of thick cut bacon, cooked and crumbled
2 crowns of broccoli, cut down into florets
1 cup of mayonnaise
2 Tbsp apple cider vinegar (I use Bragg’s with the mother)
2 Tbsp granulated sugar
1/2 cup craisins
1 1/2 cups sharp cheddar cheese, shredded
1/2 cup walnuts, chopped
Directions:
In a large mixing bowl combine broccoli, bacon, craisins, cheese and walnuts. Toss together to combine well.
In a separate bowl; mix mayonnaise, vinegar and sugar until well combine.
Pour mayonnaise mixture over the broccoli mixture and combine well.
Eat right away or chill over night and serve the following day.